DomoAI Talking Avatar Tutorial for Beginners: Create Professional Videos in Minutes
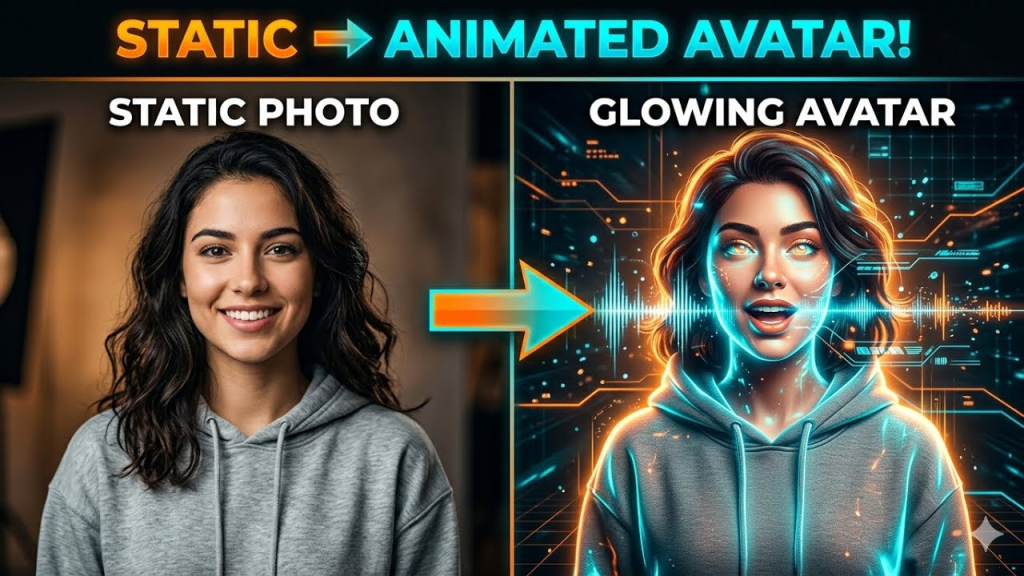
Turn any image into a talking video in under 5 minutes with DomoAI.
If you’ve been searching for ways to create engaging video content without appearing on camera yourself, talking avatars offer the perfect solution. The problem? Most AI video platforms are overwhelming for beginners, loaded with technical jargon and confusing interfaces that make simple tasks feel impossible. DomoAI changes that equation by offering an intuitive platform specifically designed for creators who want professional results without the steep learning curve.
In this comprehensive guide, I’ll walk you through everything you need to know about creating talking avatar videos using DomoAI’s powerful features, with special focus on the Seedance 2.0 tool that brings static images to life. Whether you’re a small business owner looking to create marketing videos, a content creator exploring new formats, or simply curious about AI video generation, this tutorial will have you creating professional talking avatars in minutes.
Understanding DomoAI: Interface Basics and Account Setup
Before diving into avatar creation, let’s get familiar with the DomoAI platform and set up your account for success.
Creating Your DomoAI Account
DomoAI operates primarily through Discord, which might seem unusual if you’re accustomed to traditional web-based tools. This Discord-based approach actually streamlines the creative process and provides immediate access to community support.
To get started:
1. Visit the official DomoAI website and click the “Join Discord” button
2. If you don’t have a Discord account, create one (it takes about 2 minutes)
3. Accept the server invitation and complete the verification process
4. Navigate to the newcomer channels to familiarize yourself with the layout
Once inside the DomoAI Discord server, you’ll notice multiple channels organized by function. The most important channels for beginners are the “generate” rooms where you’ll create your talking avatars.
Understanding Credit System and Pricing
DomoAI operates on a credit-based system. New users typically receive free credits to test the platform, which is perfect for this tutorial. Each talking avatar generation consumes credits based on video length and quality settings.
The basic pricing structure includes:
– Free tier: Limited credits to test features (approximately 10-20 generations)
– Starter plan: Monthly subscription with regular credit allocation
– Pro plan: Higher credit limits and priority processing
For beginners, the free credits provide ample opportunity to learn the system before committing to a paid plan.
Navigating the DomoAI Interface
The DomoAI Discord interface uses slash commands to activate different features. Simply type “/” in any generate channel to see available commands. The main commands you’ll use for talking avatars are:
– /seedance: For creating animated talking avatars
– /animate: For general animation without voice
– /help: For accessing command documentation
The interface displays your creations directly in the channel, along with generation progress and completion notifications. You can interact with finished videos using buttons below each generation for upscaling, variations, or downloading.
Creating Your First Talking Avatar with Seedance 2.0
Now comes the exciting part—bringing your first image to life as a talking avatar using DomoAI’s Seedance 2.0 feature.
Preparing Your Source Image
The quality of your talking avatar depends significantly on your source image. For best results, follow these guidelines:
Image requirements:
– Clear facial features: The face should be clearly visible and well-lit
– Forward-facing: Straight-on angles work better than profile shots
– High resolution: Minimum 512×512 pixels, though 1024×1024 is ideal
– Single subject: One face per image yields better results
– Proper lighting: Avoid harsh shadows or extreme backlighting
You can use photographs, AI-generated images, illustrations, or even cartoon characters. DomoAI’s Seedance technology adapts to various art styles, though photorealistic images typically produce the most convincing results.
Step-by-Step: Your First Seedance Generation
Step 1: Upload Your Image
In any DomoAI generate channel, click the “+” icon to upload your source image. You can also drag and drop directly into the chat. Wait for Discord to complete the upload—you’ll see a preview appear.
Step 2: Initiate the Seedance Command
Type `/seedance` in the channel. Discord will display a command interface with several options:
– Image: Click to attach your uploaded image
– Audio: Upload an audio file or paste a text script
– Motion intensity: Slider from 1-10 (start with 5 for natural movement)
– Quality: Choose between standard or high definition
Step 3: Choose Your Audio Input
Seedance 2.0 offers two audio options:
1. Upload audio file: Use pre-recorded speech, music, or sound effects (MP3 or WAV format)
2. Text-to-speech: Type your script and let DomoAI’s AI voice generator create the audio
For beginners, text-to-speech is the easiest option. Simply type your script (up to 500 characters for most plans) in the text field. The AI will analyze the speech patterns and sync them perfectly with your avatar’s mouth movements.
Step 4: Adjust Motion Settings
The motion intensity parameter controls how animated your avatar appears:
– 1-3: Subtle movements, ideal for professional business presentations
– 4-6: Natural conversation-level animation (recommended for beginners)
– 7-10: Exaggerated expressions, perfect for cartoon characters or comedic content
Start with a setting of 5, which provides realistic movement without appearing artificial.
Step 5: Generate Your Talking Avatar
Review all settings and click “Submit.” DomoAI will queue your generation and provide progress updates. Processing typically takes 2-4 minutes depending on server load and video length.
During processing, you’ll see status updates:
– “Queued” – Your request is in line
– “Processing” – AI is analyzing your image and audio
– “Rendering” – Final video compilation
– “Complete” – Your talking avatar is ready
Refining Your Results
Once your first generation completes, evaluate the results:
Check for natural movement: Does the mouth sync properly with audio? Are facial expressions appropriate?
Assess overall quality: Is the video resolution acceptable? Are there any visual artifacts?
Evaluate performance: Does the avatar convey the emotion and message you intended?
If results aren’t perfect, don’t worry—this is a learning process. Try adjusting:
– Motion intensity (lower for subtlety, higher for expressiveness)
– Source image quality (better lighting, clearer features)
– Audio clarity (clearer pronunciation in text-to-speech)
Advanced Seedance Features for Better Results
As you become comfortable with basic talking avatars, explore these advanced features:
Expression control: Some DomoAI versions allow emotion parameters like “happy,” “serious,” or “enthusiastic” to influence facial expressions.
Head movement: Beyond lip-syncing, newer models include natural head nods and tilts that make avatars more lifelike.
Background retention: Seedance 2.0 preserves your original image background while animating the face, maintaining visual consistency.
Batch processing: Create multiple versions with different audio tracks to compare results and choose the best performer.
Export Settings and Optimization for Social Media
Creating your talking avatar is only half the battle—optimizing it for different platforms ensures maximum impact and engagement.
Downloading Your Completed Video
Once generation completes, DomoAI displays your talking avatar with interaction buttons:
1. Click the Download button below your video
2. Choose your preferred quality (if options are available)
3. Save the file to your device with a descriptive name
DomoAI typically exports in MP4 format, which is universally compatible with all major platforms.
Platform-Specific Optimization

Different social media platforms have unique video specifications. Here’s how to optimize your DomoAI talking avatars for each:
YouTube
– Resolution: Use highest quality settings (1080p when possible)
– Aspect ratio: 16:9 landscape format works best
– Duration: No strict limits, but 1-3 minutes ideal for retention
– Tip: Add captions for accessibility and silent viewing
Instagram Feed & Reels
– Resolution: 1080×1920 for Reels (vertical), 1080×1080 for Feed (square)
– Aspect ratio: 9:16 for Reels, 1:1 or 4:5 for Feed
– Duration: 15-60 seconds for maximum engagement
– Tip: Use attention-grabbing first frames since autoplay is silent
TikTok
– Resolution: 1080×1920 (vertical only)
– Aspect ratio: 9:16
– Duration: 15-60 seconds (though longer is possible)
– Tip: Start with a hook in the first 2 seconds to prevent scrolling
LinkedIn
– Resolution: 1080p landscape or square
– Aspect ratio: 16:9 or 1:1
– Duration: 30 seconds to 3 minutes
– Tip: Professional tone and lower motion intensity (3-4) performs better
Facebook
– Resolution: 1080p recommended
– Aspect ratio: Square (1:1) gets 30-40% more engagement than landscape
– Duration: Under 2 minutes for optimal completion rate
– Tip: Add text overlays since 85% of videos are watched without sound
Adjusting Your Avatar for Different Formats
If your original DomoAI generation doesn’t match your target platform’s specifications, use these strategies:
Aspect ratio conversion: Use free tools like Kapwing, Canva, or Adobe Express to reframe your video. Add branded backgrounds to fill empty space when converting landscape to vertical.
Resolution upscaling: Some DomoAI plans include upscale options directly in Discord. Alternatively, use tools like Topaz Video AI for offline upscaling.
Length trimming: Most video editors (even free ones like DaVinci Resolve or Clipchamp) allow you to trim your talking avatar to platform-optimal lengths.
Adding Polish with Post-Processing
While DomoAI creates impressive talking avatars out of the box, small enhancements dramatically improve professional appeal:
Subtitles and captions: Tools like Descript, Rev, or Kapwing automatically generate accurate captions that improve accessibility and engagement.
Background music: Add subtle background tracks (ensure they’re royalty-free) to increase production value. Keep volume low so it doesn’t compete with your avatar’s voice.
Intro/outro cards: Bookend your talking avatar with branded intro and outro frames that include calls-to-action.
Logo watermarks: Add your business logo as a subtle watermark for brand consistency across platforms.
Color grading: Light color correction can match your avatar’s tone to your brand aesthetic.
Best Practices for Social Media Success
Creating the video is just the beginning. Follow these tips to maximize engagement:
Hook viewers immediately: Your talking avatar should deliver the most compelling information in the first 3 seconds.
Test different motion intensities: Professional audiences may prefer subtle animation (3-4), while entertainment content works with higher settings (6-8).
Maintain consistent avatar branding: If creating a series, use the same source image and similar settings so your audience recognizes your avatar.
Optimize posting times: Share when your target audience is most active—this varies by platform and demographic.
Include clear CTAs: Tell viewers exactly what action to take after watching (visit website, comment, follow, purchase).
A/B test variations: Create multiple versions with different scripts, motion settings, or expressions to identify what resonates best.
Troubleshooting Common Export Issues
Problem: Video quality degrades after platform upload
Solution: Upload at the highest resolution DomoAI provides, and avoid re-compressing before upload
Problem: Audio out of sync after download
Solution: This is rare with DomoAI but can happen with slow internet during download—try downloading again or using a different browser
Problem: File size too large for platform
Solution: Use HandBrake or similar compression tools to reduce file size while maintaining visual quality
Problem: Avatar looks artificial or uncanny
Solution: Lower motion intensity, use higher quality source images, and ensure proper lighting in original photos
Conclusion: Your Talking Avatar Journey Begins Now
DomoAI’s Seedance 2.0 feature democratizes video creation by eliminating the traditional barriers of cameras, recording equipment, and on-camera confidence. In just minutes, you’ve learned to transform static images into engaging talking avatars that can represent your business, explain concepts, or entertain audiences.
The key to mastery is experimentation. Start with the basics outlined in this tutorial, then progressively explore advanced features as you become comfortable. Each generation teaches you something new about motion settings, image selection, and platform optimization.
Remember that even with AI assistance, great content requires thoughtful strategy. Your talking avatar is a tool—its effectiveness depends on compelling scripts, appropriate tone, and strategic distribution. Focus on delivering value to your audience, and the technology will amplify your message.
With DomoAI’s continually evolving features and the foundation you’ve built through this tutorial, you’re now equipped to create professional talking avatar videos that compete with productions costing thousands of dollars. The only limit is your creativity.
Start simple, iterate based on results, and watch as your AI-generated talking avatars transform your content strategy and audience engagement.
Frequently Asked Questions
Q: How much does DomoAI cost for creating talking avatars?
A: DomoAI operates on a credit-based system with free trial credits for new users (usually enough for 10-20 generations). Paid plans start with a Starter subscription offering monthly credits, and Pro plans provide higher limits with priority processing. Each talking avatar generation consumes credits based on video length and quality settings.
Q: What image quality do I need for the best talking avatar results?
A: For optimal results, use images with clear facial features, forward-facing angles, and minimum resolution of 512×512 pixels (1024×1024 is ideal). Ensure proper lighting without harsh shadows, and use images with a single subject. Both photographs and AI-generated images work well, though photorealistic images typically produce the most convincing results.
Q: Can I use my own voice recording or do I have to use text-to-speech?
A: DomoAI’s Seedance 2.0 supports both options. You can upload pre-recorded audio files in MP3 or WAV format, or use the built-in text-to-speech feature by typing your script (up to 500 characters). For beginners, text-to-speech is easiest, while custom audio gives you more control over tone and delivery.
Q: How long does it take to generate a talking avatar video?
A: Most talking avatar videos process in 2-4 minutes, depending on server load, video length, and quality settings. You’ll see real-time status updates showing when your request is queued, processing, rendering, and complete. During peak times, processing may take slightly longer.
Q: What motion intensity setting should beginners start with?
A: Beginners should start with a motion intensity setting of 5, which provides realistic, natural movement without appearing artificial. Settings 1-3 create subtle movements ideal for professional presentations, 4-6 offer natural conversation-level animation, and 7-10 produce exaggerated expressions better suited for cartoon characters or comedic content.
Q: Can I use DomoAI talking avatars commercially for my business?
A: Yes, DomoAI-generated talking avatars can typically be used for commercial purposes depending on your subscription plan. Review DomoAI’s specific terms of service for your plan tier, but most paid subscriptions include commercial usage rights for content you create, making them suitable for marketing videos, social media, and business presentations.