Free AI Talking Avatar Tools for Faceless YouTube Channels: Complete 2026 Guide
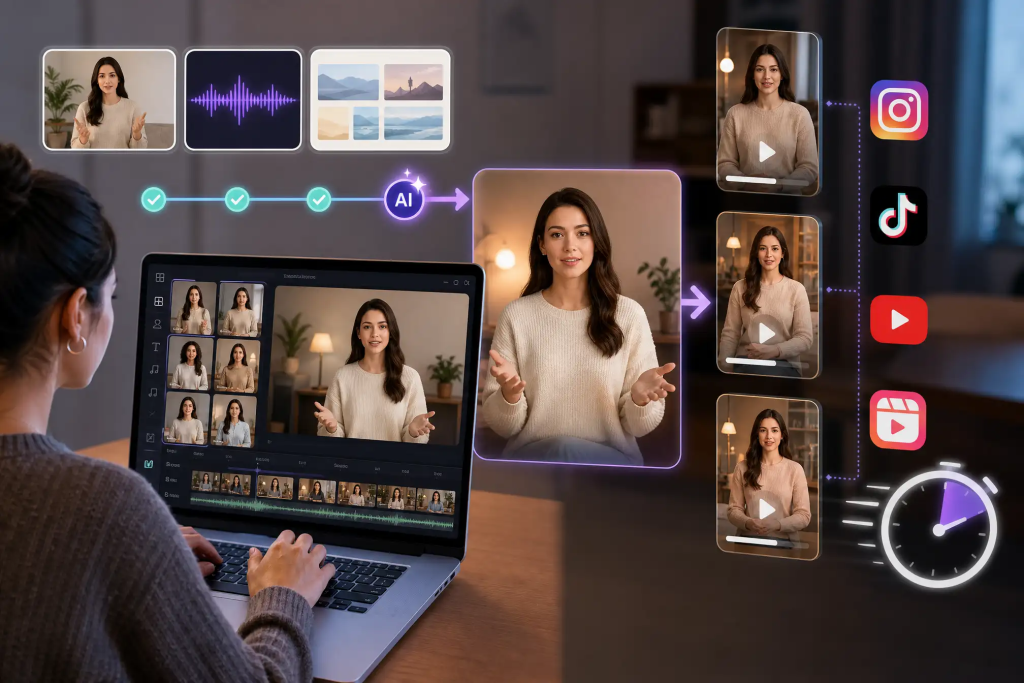
Want to create YouTube videos without ever showing your face? Here’s how to make a realistic talking AI avatar for free.
Why Faceless YouTube Channels Are Exploding in 2026
The demand for faceless content has skyrocketed, with successful channels earning millions without ever revealing their creators’ identities. Whether you’re camera-shy, value privacy, or simply want to scale content production without the constraints of filming yourself, AI talking avatars offer a compelling solution. The challenge has always been cost—most professional avatar tools charge $30-100 monthly. But with recent advances in free AI tools, you can now create realistic talking avatars without spending a dime.
Act 1: Generating Your Realistic AI Avatar Using Free Tools
Understanding the Free Tool Ecosystem
Creating a talking avatar involves three core components: generating the avatar image, creating the voiceover, and syncing the mouth movements. While paid platforms like Synthesia bundle these features, we’ll achieve the same results using free alternatives.
Step 1: Creating Your Avatar Image with ChatGPT
ChatGPT’s DALL-E integration provides surprising quality for avatar generation. Here’s the exact process:
Crafting the Perfect Prompt:
The key to realistic avatars lies in prompt specificity. Generic requests yield generic results. Instead, use this framework:
“Generate a photorealistic portrait of a [age] year old [gender] [ethnicity] person with [specific features], professional headshot style, neutral expression, looking directly at camera, studio lighting, plain [color] background, shoulders visible, high resolution”
Example prompts that work:
– “Photorealistic portrait of a 35-year-old professional woman with brown hair in a ponytail, wearing business casual attire, slight smile, direct eye contact, soft studio lighting, grey background”
– “Professional headshot of a 40-year-old man with short beard, glasses, friendly expression, navy blue shirt, white background, corporate photography style”
Pro Tips for Better Results:
– Specify “photorealistic” or “professional photography” to avoid cartoonish outputs
– Include lighting details—”studio lighting” or “soft natural light” dramatically improves quality
– Request “neutral expression” or “slight smile” as extreme expressions don’t animate well
– Always specify “plain background” to make later editing easier
– Generate 3-4 variations and select the best one
Step 2: Alternative Avatar Sources
If ChatGPT doesn’t deliver the style you need, consider these free alternatives:
Leonardo.AI offers 150 free daily credits for photorealistic character generation with superior control over pose and style. Their “PhotoReal” model produces commercial-quality portraits.
Artbreeder allows you to blend and customize existing faces, creating unique avatars without starting from scratch. Perfect for fine-tuning specific facial features.
This Person Does Not Exist generates random photorealistic faces instantly—refresh until you find one that fits your brand, then download for free.
Step 3: Setting Up Google Flow (or Alternatives)
Google Flow (if referring to a text-to-video tool) or alternative free lip-sync tools form the animation backbone. However, since Google Flow isn’t a widely recognized tool as of 2024, let’s focus on actual free alternatives:
D-ID Free Tier:
While D-ID is primarily paid, they offer 20 free credits monthly (about 5 minutes of video). This is sufficient for testing and occasional use.
Sync Labs (Beta Access):
Offers free beta access for realistic lip-syncing. Upload your avatar image and audio file, and their AI handles the rest.
Wav2Lip (Open Source):
The truly free option requiring minimal technical knowledge. You can run it via Google Colab notebooks without installing anything on your computer.
Step 4: Creating Your Voiceover
Free Text-to-Speech Options:
ElevenLabs Free Tier provides 10,000 characters monthly with remarkably natural voices. Their “Adam,” “Bella,” and “Antoni” voices work excellently for educational content.
Google Cloud Text-to-Speech offers $300 in free credits for new users, translating to thousands of minutes of audio.
Natural Reader provides basic but serviceable voices completely free for unlimited use.
Script Writing Tips:
Your avatar is only as good as your script. Write for speech, not reading:
– Use shorter sentences (15-20 words maximum)
– Include natural pauses with punctuation
– Add “um” or “so” sparingly for authenticity
– Read your script aloud before generating audio
– Match your avatar’s perceived personality (professional, casual, friendly)
Act 2: Adding Natural Lip-Sync, Movements, and Expressions
The Lip-Sync Process Using Wav2Lip
Wav2Lip is open-source software that creates surprisingly realistic lip-sync animation from static images.
Using Wav2Lip via Google Colab:
1. Access the Notebook: Search for “Wav2Lip Google Colab” and open a community notebook (several creators maintain updated versions)
2. Upload Your Assets: Upload your avatar image (JPG/PNG) and audio file (MP3/WAV)
3. Configure Settings: Select quality settings—”high quality” takes longer but produces noticeably better results
4. Run the Cell: Execute the processing cell and wait 2-5 minutes depending on video length
5. Download Your Video: The output video will feature your avatar speaking with synced mouth movements
Optimization Tips:
– Use high-resolution avatar images (at least 1080p) for better quality
– Ensure your audio is clear with minimal background noise
– The closer your avatar’s original expression is to neutral, the better the sync looks
– Process videos in segments under 2 minutes for faster rendering
Adding Hand Gestures and Body Movement
Static avatars with only moving mouths look unnatural. Here’s how to add life:
Option 1: Subtle Animation with Video Editing
Even basic tools like Canva Video Editor (free tier) allow you to add:
– Slight zoom in/out effects (2-5% movement creates perceived breathing)
– Slow pan across the face during longer speaking segments
– Fade transitions between different avatar poses for topic changes
Option 2: Animated Avatar Platforms
Canva’s Talking Photo Feature (free with limitations) provides basic head movements and expressions automatically.
Reallusion Character Creator offers free trials that include hand gesture animations you can overlay.
Enhancing Facial Expressions
Micro-expressions make avatars believable. While fully free options are limited, you can:
Create Multiple Avatar Versions:
Generate 3-4 versions of your avatar with different expressions (neutral, slight smile, concerned, enthusiastic). Cut between them during editing to match your content’s emotional tone.
Strategic Cuts:
Study successful faceless channels—they rarely show avatars for extended periods. Cut to B-roll, screen captures, or graphics every 15-30 seconds. This reduces the uncanny valley effect while improving engagement.
Avoiding the “Uncanny Valley”
AI avatars can feel “off” if not executed properly:
What Works:
– Slight imperfections (don’t over-polish)
– Consistent lighting between scenes
– Natural pacing (not too fast)
– Environmental context (add subtle background blur)
What Fails:
– Perfect symmetry (looks artificial)
– Excessive facial movement
– Mismatched audio quality
– Robotic voice delivery
Act 3: Best Practices for Professional AI Avatars
Content-Type Specific Optimization
Educational Content:
– Use professional, friendly avatar (30-45 years old works best for perceived authority)
– Maintain neutral to slightly positive expression
– Slower pacing with clear enunciation
– Position avatar in corner or side of frame, not center
– Focus on complementary visuals (diagrams, text overlays)
Business/Marketing Content:
– Corporate attire and backgrounds
– Confident expressions
– Higher production value in editing
– Professional voiceover delivery
– Minimal avatar screen time (20-30% of video)
Entertainment/Commentary:
– More expressive avatars with personality
– Varied expressions between segments
– Natural, conversational delivery
– Longer avatar segments acceptable (up to 60%)
– Match avatar energy to content tone
Technical Quality Standards
Resolution Requirements:
– Minimum 1080p for avatar source images
– Export final videos at 1080p or 4K
– Maintain 30fps minimum (60fps for premium feel)
Audio Specifications:
– 192kbps bitrate minimum
– Remove background noise with Audacity (free)
– Normalize audio levels (-3dB peak)
– Add subtle room tone for naturalness
Color Grading:
Even free editors like DaVinci Resolve allow basic color correction:
– Slightly warm colors (+10-15 kelvin) appear more human
– Avoid oversaturation
– Match avatar colors to your brand palette
Building Trust with Your Audience
Transparency matters. Consider these approaches:
Option 1: Full Transparency
“This channel uses AI avatars to focus on content quality rather than on-camera presence.”
Option 2: Subtle Introduction
“Meet [Name], your guide for [topic]” without explaining the AI nature upfront.
Option 3: Character Approach
Present your avatar as an intentional character/mascot rather than attempting to pass as fully human.
Successful channels use all three approaches—choose what aligns with your brand values.
Workflow Efficiency Tips
Batch Production:
– Generate 10-20 avatar variations in one session
– Create voiceovers for multiple scripts simultaneously
– Process lip-sync for entire week’s content at once
Template System:
– Save successful prompts for consistent avatar generation
– Create video editing templates for faster production
– Maintain a library of B-roll and graphics
Quality Checklist:
Before publishing, verify:
– [ ] Lip-sync accuracy (watch on mute, does timing feel right?)
– [ ] Audio clarity (no distortion or clipping)
– [ ] Natural pacing (not too rushed)
– [ ] Consistent lighting across scenes
– [ ] Appropriate avatar screen time for content type
– [ ] Mobile viewing optimization (how does it look small?)
Scaling Your Faceless Channel
Once you’ve mastered free tools:
Monetization Thresholds:
Wait until you’re earning $100-200 monthly before investing in paid tools. This ensures positive ROI.
When to Upgrade:
Consider paid options when:
– You need faster production (time = money)
– Quality limitations affect viewer retention
– You’re producing daily content
– Brand deals require higher production value
Popular Upgrade Path:
1. Start: 100% free tools (months 1-3)
2. Add: Paid voice AI like ElevenLabs ($5/month)
3. Upgrade: Professional avatar platform ($30/month)
4. Scale: Full automation tools ($100+/month)
Legal and Ethical Considerations
Copyright Issues:
– Images generated by AI (ChatGPT, Leonardo) are typically safe for commercial use, but verify terms
– Don’t use photos of real people without permission
– Avoid creating avatars that impersonate specific individuals
Disclosure Requirements:
YouTube’s policies on synthetic media continue evolving. Best practices:
– Disclose AI use in your channel about section
– Consider adding “AI generated” to video descriptions
– Never deceive viewers about news or current events using AI avatars
Common Mistakes to Avoid

Mistake 1: Overusing Avatar Screen Time
New creators show avatars for 80%+ of video duration. Aim for 30-40% maximum, cutting to visuals, demonstrations, or B-roll frequently.
Mistake 2: Robotic Scripts
Writing formal text rather than conversational speech makes AI voices sound worse. Use contractions, ask rhetorical questions, and vary sentence structure.
Mistake 3: Inconsistent Avatar Appearances
Switching avatar styles between videos confuses audiences. Once you choose an avatar, maintain consistency for at least 20-30 videos.
Mistake 4: Ignoring Analytics
Monitor audience retention at avatar-heavy segments. If viewership drops during talking head sections, reduce avatar time.
Mistake 5: Perfectionism
Your first 10 videos will look amateur regardless of tool quality. Focus on consistent publishing over perfect production.
Conclusion: Your Free Avatar Action Plan
Creating professional AI talking avatars without budget is entirely achievable in 2024. Here’s your week-one action plan:
Day 1-2: Generate 5 avatar variations using ChatGPT or Leonardo.AI. Select your best option.
Day 3: Write and create your first voiceover using ElevenLabs free tier. Keep it under 2 minutes.
Day 4: Learn Wav2Lip basics with a test run using your avatar and audio.
Day 5: Create your first complete talking avatar video.
Day 6: Edit the video with B-roll and graphics using a free editor like DaVinci Resolve or Canva.
Day 7: Publish and gather feedback.
The faceless YouTube space is more accessible than ever. With these free tools and techniques, you can launch your channel without ever stepping in front of a camera—or spending money on expensive software. Start with the basics, maintain consistency, and upgrade strategically as your channel grows.
Your audience cares about value, not whether your presenter is human or AI. Focus on delivering exceptional content, and your faceless channel can compete with any traditional creator in your niche.
Frequently Asked Questions
Q: Are free AI avatar tools actually good enough for professional YouTube channels?
A: Yes, but with caveats. Free tools like Wav2Lip combined with ElevenLabs voice AI can produce professional-quality results suitable for educational and business content. However, they require more manual work and technical learning compared to paid all-in-one solutions. Many successful faceless channels started with free tools and only upgraded after proving their content concept and reaching monetization. The key is focusing on content quality and using avatars strategically (30-40% screen time) rather than relying on avatar quality alone.
Q: Do I need to disclose that I’m using an AI avatar on my YouTube channel?
A: While not strictly required by law in most jurisdictions, YouTube’s evolving policies on synthetic media increasingly encourage transparency. Best practice is to mention AI use in your channel’s About section and video descriptions, especially for news or educational content. Most successful faceless creators find that audiences don’t mind AI avatars as long as the content provides value and there’s no deceptive intent. Transparency actually builds trust and prevents potential issues if policies change.
Q: How long does it take to create a 10-minute video using free AI avatar tools?
A: Expect 4-6 hours for your first few videos as you learn the workflow. This breaks down to: 1 hour scripting, 30 minutes generating voiceover, 1 hour creating/processing the avatar with lip-sync, and 2-3 hours editing with B-roll and graphics. After creating 5-10 videos, you’ll optimize the process to 2-3 hours per video. The key time-saver is batching—generate multiple avatars and voiceovers in single sessions rather than one video at a time.
Q: Can I monetize YouTube videos that use AI-generated avatars?
A: Yes, AI-generated avatars don’t disqualify you from YouTube Partner Program monetization, provided your content meets all other requirements (original, advertiser-friendly, follows community guidelines). Thousands of faceless channels using AI avatars are successfully monetized. The content quality, watch time, and audience engagement matter far more than how the avatar was created. Focus on delivering value and meeting the 1,000 subscriber and 4,000 watch hour thresholds.
Q: What’s the biggest mistake beginners make with AI talking avatars?
A: The most common mistake is showing the avatar too much—new creators often feature their AI avatar for 70-80% of the video, which emphasizes any imperfections and bores viewers. Successful faceless channels show avatars only 30-40% of the time, cutting frequently to B-roll, screen recordings, graphics, and text overlays. This keeps videos dynamic, minimizes the uncanny valley effect, and actually improves audience retention. Your avatar should introduce topics and provide transitions, not dominate the entire video