DomoAI Talking Avatar Tutorial for Beginners: Create Professional Videos in Minutes
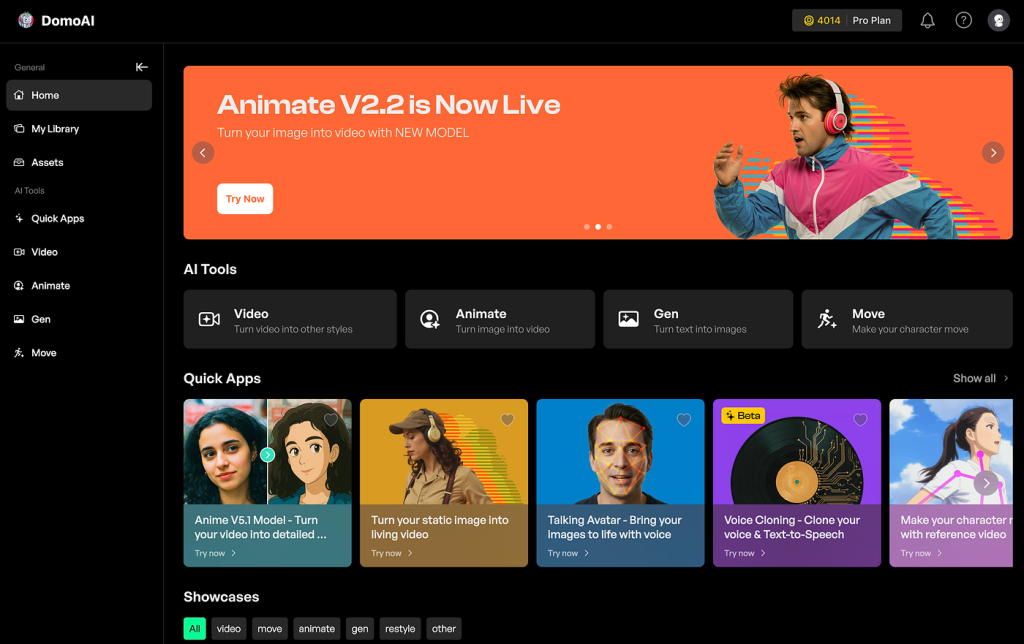
Turn any image into a talking video in under 5 minutes with DomoAI.
If you’ve been watching those polished talking avatar videos flood your social media feeds and wondering how creators make them, you’re not alone. The explosion of AI video tools has left many beginners overwhelmed, staring at complex interfaces without knowing where to click first. DomoAI’s talking avatar feature promises simplicity, but even “user-friendly” platforms can feel intimidating when you’re starting from scratch.
This tutorial walks you through DomoAI’s talking avatar creation process step-by-step, focusing specifically on the Seedance 2.0 feature that transforms static images into animated, lip-synced videos. Whether you’re a small business owner looking to create quick marketing content or simply curious about AI video generation, you’ll finish this guide knowing exactly how to produce your first talking avatar video.
Act 1: Understanding DomoAI’s Interface and Getting Set Up
Creating Your DomoAI Account
Before you can create talking avatars, you need access to DomoAI. The platform operates primarily through Discord, which catches many beginners off guard who expect a traditional web application.
Here’s how to get started:
1. Join the DomoAI Discord server by visiting their official website and clicking the Discord invitation link
2. Navigate to the verification channel and follow the prompts to gain access to the creation channels
3. Locate the creation channels – look for channels labeled with names like “#generate” or “#create”
4. Understand the credit system – DomoAI operates on a credit-based model where each generation consumes credits
New users typically receive free credits to test the platform, but you’ll eventually need to purchase a subscription plan. The Basic plan usually provides enough credits for small business owners creating occasional marketing content, while the Pro plan suits creators producing daily content.
Navigating the DomoAI Interface
Unlike traditional software with buttons and menus, DomoAI uses Discord’s chat interface with slash commands. This approach confuses beginners initially but becomes intuitive quickly.
The essential commands you need to know:
– /seedance – Initiates the talking avatar creation process
– /video – Accesses other video generation features
– /help – Displays available commands and their functions
When you type a slash command, DomoAI responds with a form or prompt where you’ll upload images and specify parameters. The bot then processes your request and returns the generated video directly in the chat channel.
Preparing Your Source Materials
Before diving into creation, gather your materials:
Image Requirements:
– Clear, front-facing portraits work best
– Resolution of at least 512×512 pixels (higher is better)
– Well-lit images with visible facial features
– PNG or JPG format
Audio Requirements:
– MP3, WAV, or M4A file formats
– Clear voice recordings without excessive background noise
– Maximum length typically around 60-120 seconds (check current limits)
– Alternatively, you can use DomoAI’s text-to-speech feature
Pro tip: If you don’t have a suitable portrait photo, you can generate one using DomoAI’s image generation features or other AI art tools like Midjourney first, then animate it with Seedance.
Act 2: Creating Your First Talking Avatar with Seedance 2.0
Understanding Seedance 2.0
Seedance 2.0 is DomoAI’s upgraded animation engine specifically designed for creating talking avatars. It analyzes facial features in your image and synchronizes mouth movements with audio input, creating the illusion that the person in the photo is speaking.
The technology works by:
– Mapping facial landmarks on your source image
– Analyzing the audio waveform and phonemes
– Generating appropriate mouth shapes for each sound
– Adding subtle head movements and expressions for realism
Step-by-Step Creation Process
Step 1: Initiate the Seedance Command
In your DomoAI creation channel, type `/seedance` and press enter. A form will appear with several fields to complete.
Step 2: Upload Your Image
Click the image upload field and select your portrait photo. Wait for the upload to complete – you’ll see a thumbnail preview confirming the image loaded successfully.
Common beginner mistakes to avoid:
– Using group photos (the AI may not identify which face to animate)
– Uploading images where the face is too small in the frame
– Using heavily filtered or distorted images that obscure facial features
Step 3: Add Your Audio
You have two options for audio:
Option A: Upload Audio File
If you’ve pre-recorded your speech, click the audio field and upload your file. This gives you maximum control over voice, tone, and pacing.
Option B: Use Text-to-Speech
Enter your text in the designated field, and DomoAI will generate speech automatically. The platform typically offers multiple voice options – experiment to find one that matches your content’s tone.
For business videos, I recommend recording your own audio for authenticity, but text-to-speech works perfectly for quick tests or when you need multiple videos quickly.
Step 4: Adjust Advanced Settings
Seedance 2.0 includes several parameters you can adjust:
– Expression Intensity: Controls how animated the facial movements appear (start with medium)
– Head Motion: Determines how much the head moves while speaking (subtle works best for professional content)
– Background: Choose whether to keep the original background or apply effects
For your first video, stick with default settings. You can experiment with these parameters once you understand the basics.
Step 5: Generate and Wait
Click submit and wait for DomoAI to process your request. Generation time varies based on:
– Server load (peak times take longer)
– Video length (longer audio = longer processing)
– Your subscription tier (premium users may get priority)
Typically, expect 1-3 minutes for a 30-second video. The bot will ping you when generation completes.
Evaluating Your First Result
When your video appears, watch it critically:
What to look for:
– Does the lip sync match the audio reasonably well?
– Are facial movements natural, or do they look robotic?
– Are there any glitches or distortions around the mouth area?
– Does the overall quality meet your standards?
Don’t expect perfection on your first attempt. AI-generated talking avatars have limitations – they work best with clear, simple speech and standard facial angles.
If you’re unsatisfied, identify what needs improvement:
– Poor lip sync? Try clearer audio with more distinct pronunciation
– Unnatural movements? Adjust the expression intensity settings
– Quality issues? Use a higher-resolution source image
Troubleshooting Common Issues
Problem: The mouth movements look off
– Solution: Ensure your audio is clear without mumbling or overlapping voices
– Try reducing background music that might interfere with phoneme detection
Problem: The video looks distorted
– Solution: Use a higher-quality source image with better lighting
– Ensure the face occupies a significant portion of the frame
Problem: Generation failed
– Solution: Check that your image and audio meet file size and format requirements
– Verify you have sufficient credits remaining
– Try a different creation channel if one is experiencing issues
Act 3: Export Settings and Optimization for Social Media
Downloading Your Talking Avatar
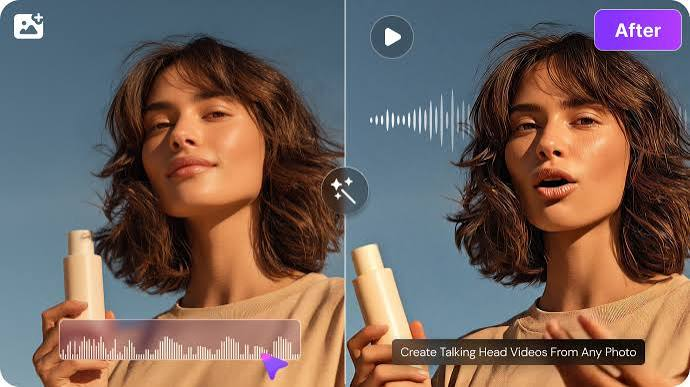
Once you’re happy with your generated video, downloading is straightforward:
1. Click on the video in Discord to expand it to full size
2. Right-click (or long-press on mobile) and select “Save Video”
3. Choose your destination folder and save
The video downloads in MP4 format, which is universally compatible with social media platforms, video editors, and presentation software.
Optimizing for Different Platforms
Different social media platforms have different video specifications. While DomoAI outputs a standard format, you may want to optimize further:
For Instagram Reels and TikTok:
– Aspect ratio: 9:16 (vertical)
– If your DomoAI video is square or horizontal, use a video editor to add background or crop to vertical
– Keep videos under 60 seconds for maximum reach
– Add captions – many users watch without sound
For Facebook and LinkedIn:
– Aspect ratio: 1:1 (square) or 16:9 (horizontal) both work
– Add compelling thumbnails in the first frame
– Include text overlays summarizing key points
For YouTube:
– Aspect ratio: 16:9 (horizontal)
– Longer videos (2-3 minutes) perform well
– Consider using your talking avatar as an intro, then transitioning to other content
For Email Marketing:
– Keep file size under 5MB for email embedding
– Use as thumbnail linking to full video on your website
– Consider GIF versions for email clients that don’t support video
Enhancing Your Videos Further
While DomoAI creates impressive talking avatars, you can take them to the next level with basic editing:
Add Text Overlays:
Use free tools like CapCut or DaVinci Resolve to add:
– Titles and headlines
– Key points or bullet points
– Call-to-action text
– Your logo or branding
Include Background Music:
Add subtle background music to make your videos more engaging. Ensure the music doesn’t overpower the speech – keep it 20-30% of speech volume.
Create Series:
Instead of one-off videos, create a series with consistent branding:
– Same background style
– Consistent intro/outro
– Unified color scheme
– Regular posting schedule
Pro Tips for Better Results
Tip 1: Script Your Content
Don’t wing it. Write a script that:
– Gets to the point quickly (first 3 seconds are crucial)
– Uses conversational language
– Includes a clear call-to-action
– Stays under 60 seconds for social media
Tip 2: Use High-Quality Source Images
The better your input image, the better your output. Consider:
– Professional headshots if you’re creating business content
– AI-generated portraits for character consistency
– Well-lit photos with neutral backgrounds
Tip 3: Batch Create Content
Once you’re comfortable with the process, create multiple videos in one session:
– Record several audio scripts
– Generate multiple variations
– Build a content library for scheduled posting
Tip 4: Test Different Voices
If using text-to-speech, test various voices to find what resonates with your audience:
– Professional and authoritative for B2B content
– Friendly and casual for consumer products
– Energetic and enthusiastic for youth-oriented content
Tip 5: Monitor Performance
Track which talking avatar videos perform best:
– What topics get most engagement?
– Which video lengths retain viewers?
– What posting times work best?
– Use these insights to refine your strategy
Understanding Credit Usage and Costs
DomoAI’s credit system determines how much you can create:
– Each Seedance generation consumes a specific number of credits
– Longer videos typically cost more credits
– Premium features may require additional credits
For small business owners, calculate your monthly content needs:
– How many videos do you want to create weekly?
– What’s the average length?
– Multiply by the credit cost per generation
– Choose a plan that provides sufficient credits with some buffer
Building Your Talking Avatar Strategy
Now that you understand the technical process, develop a content strategy:
For Product Marketing:
– Create explainer videos for product features
– Share customer testimonials (with permission)
– Announce new releases or updates
– Provide quick tips and tricks
For Personal Branding:
– Share industry insights and commentary
– Create educational content in your niche
– Post motivational or inspirational messages
– Develop a consistent video persona
For Team Communication:
– Create training videos for new employees
– Send video updates instead of long emails
– Produce department announcements
– Build a library of FAQ responses
Conclusion: Your Next Steps
You now have everything you need to create professional-looking talking avatar videos with DomoAI’s Seedance feature. The platform removes the technical barriers that once made video creation the domain of specialists with expensive software.
Start with simple projects: a 30-second introduction, a quick product announcement, or a brief tip related to your business. As you gain confidence, experiment with longer content, different styles, and various applications.
The key is consistency. Don’t create one video and stop. Commit to producing regular content, learning from each generation, and refining your approach. The creators seeing success with talking avatar videos aren’t necessarily more talented – they’re simply more consistent and willing to iterate.
Your first video won’t be perfect, and that’s okay. Each video you create teaches you something new about the platform, your audience, and what works. So open DomoAI, upload that first image, and start creating. Your talking avatar awaits.
Frequently Asked Questions
Q: How much does DomoAI cost for talking avatar creation?
A: DomoAI operates on a credit-based subscription model. New users typically receive free credits to test the platform. Paid plans usually start around $10-30 per month for basic usage, with higher tiers offering more credits and priority processing. Each Seedance talking avatar generation consumes credits based on video length, so calculate your monthly needs before choosing a plan.
Q: Can I use any image to create a talking avatar with DomoAI?
A: While DomoAI accepts most images, best results come from clear, front-facing portraits where the face occupies a significant portion of the frame. The image should be at least 512×512 pixels with good lighting and visible facial features. Avoid group photos, heavily filtered images, or photos where the face is at extreme angles. You can use photographs of real people (with permission) or AI-generated portraits.
Q: Do I need to record my own voice or can DomoAI generate speech?
A: DomoAI offers both options. You can upload your own pre-recorded audio file (MP3, WAV, or M4A format) for maximum control and authenticity, or use the text-to-speech feature where you type your script and DomoAI generates the voice automatically. For business videos, recording your own voice adds authenticity, while text-to-speech is perfect for quick tests or when you need to produce multiple videos rapidly.
Q: How long does it take to generate a talking avatar video?
A: Generation time varies based on several factors including server load, video length, and your subscription tier. Typically, expect 1-3 minutes for a 30-second video. During peak usage times, processing may take longer. Premium subscribers may receive priority processing. The DomoAI bot will ping you in Discord when your video is ready to download.
Q: Can I edit my DomoAI talking avatar videos after creation?
A: Yes, once you download your video from DomoAI in MP4 format, you can edit it using any video editing software like CapCut, DaVinci Resolve, Adobe Premiere, or even simple mobile apps. Common edits include adding text overlays, incorporating background music, including your logo, creating intros/outros, and optimizing the aspect ratio for different social media platforms. The downloaded video is yours to modify as needed.